Download Entire Website to Build Again
Want to consign WordPress site content, your database, or everything? Whether you self-host WordPress or have a WordPress.com site, exporting is useful if you need to drift to a unlike hosting provider, server, or from a hosted WordPress website to a self-hosted one.
When you export a WordPress website, it means you're saving and moving your site in function or in whole to exist sent elsewhere. You lot tin save it to your computer so y'all can migrate your website or keep what y'all have saved as a redundant backup.
There are multiple ways yous can export your WordPress site. Let'south dive in!
How to Export WordPress Site from WordPress.com
If y'all have a managed WordPress.com site and you want to know how to export WordPress site content – in part or entirely – to a new host, yous can follow the steps below.
Exporting All or Specific Content
There are certain types of content y'all tin export:
- Posts and pages
- Feedback
- Media library content
- Links (blogroll)
Pace 1
When y'all're ready to consign your WordPress site, be certain you have logged into your WordPress.com account. Once you're logged in, get-go by choosing the website where you desire to export content.
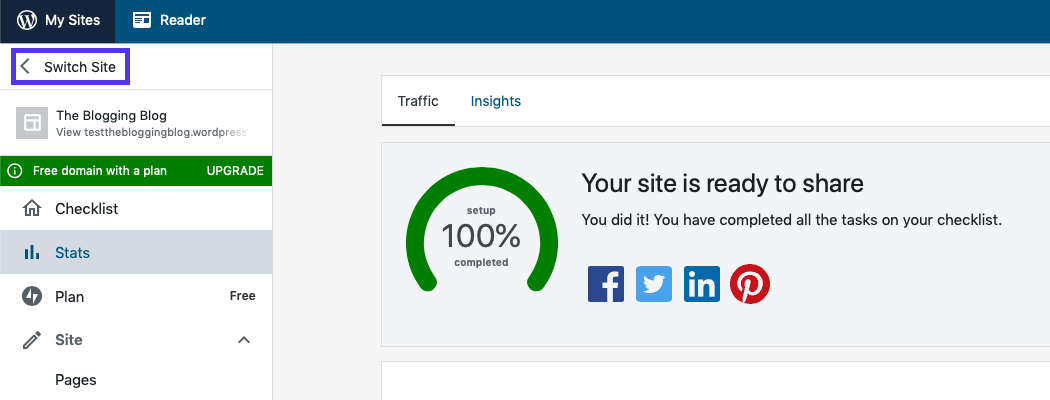
Click on My Sites at the meridian left-manus corner. If you have multiple sites, but don't see the one yous want to export listed toward the acme of the menu on the left, click Switch Site.
Then, click on the site listed on the left of which y'all want its content exported.

Step 2
Side by side, get to Tools > Export in the menu on the left-hand side. Here, you can consign WordPress site content.
To export all your site's content, click the Export All button.
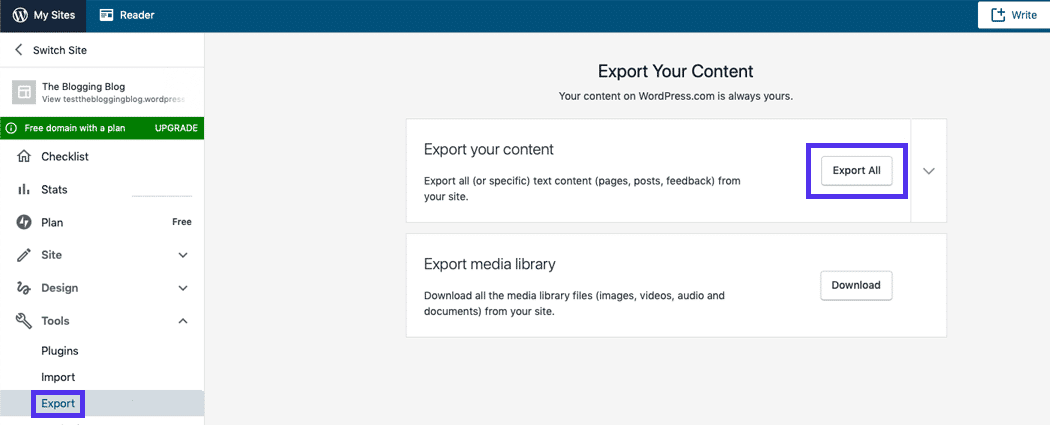
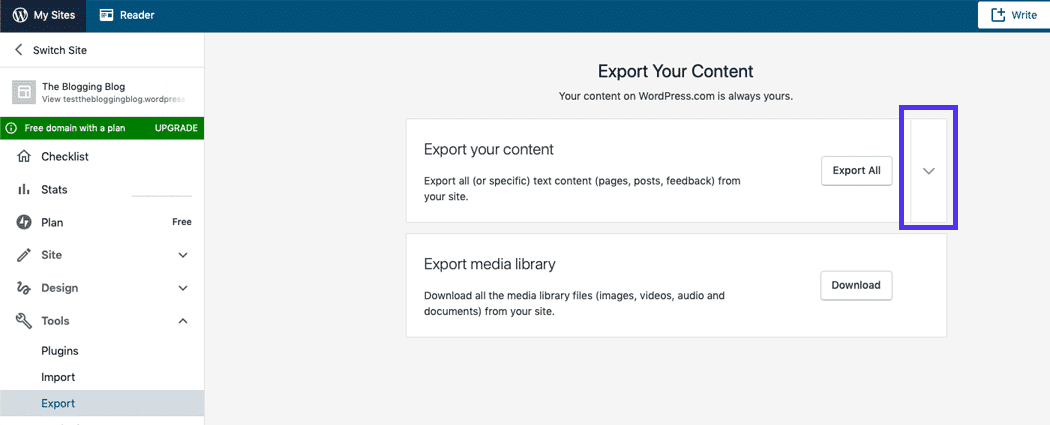
Or, if you just want to export certain types of content, click the arrow adjacent to the Consign All push. You lot'll be able to select the specific content y'all want to export.
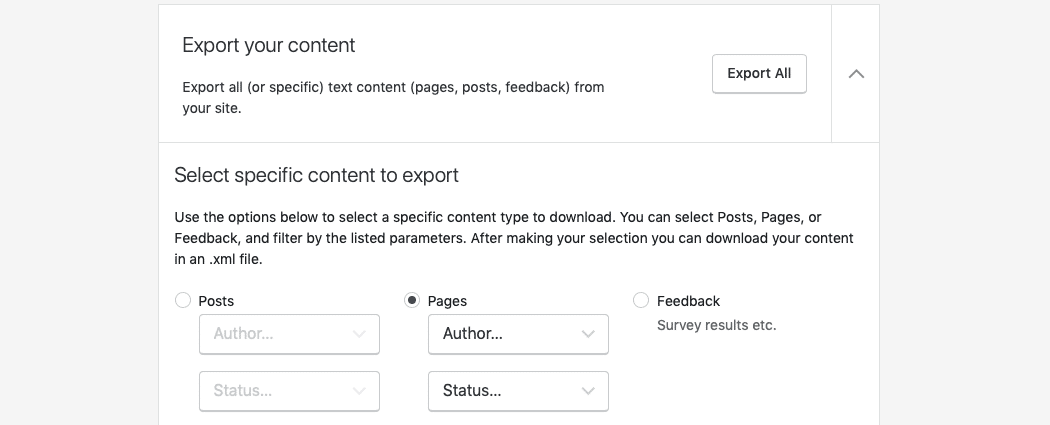
Then, make a selection to export posts, pages, or feedback.
There are also additional options that become available later yous accept selected either the posts or pages options.
If y'all click on them, you lot tin can further specify what you want to export.
For the Posts choice, y'all can refine what you export by:
- Author
- Status
- Start date
- Cease date
- Category
For the Pages option, yous can go more specific past selecting the:
- Author
- Condition
- Commencement engagement
- End date
Footstep three
Subsequently you have made your choice, click the Export Selected Content push button.
Whether you cull to consign all or select content, the process will have begun to export WordPress site content. Depending on how large your site is, this may take several minutes.
Once your content has been successfully exported, you should see a bulletin indicating that.
Step 4
An electronic mail will be sent to yous with a link to download your exported content. It will be in a Zilch file.
You can also download the exported content and save it to your computer directly abroad.
To practise this, click the Download link in the "success" message.
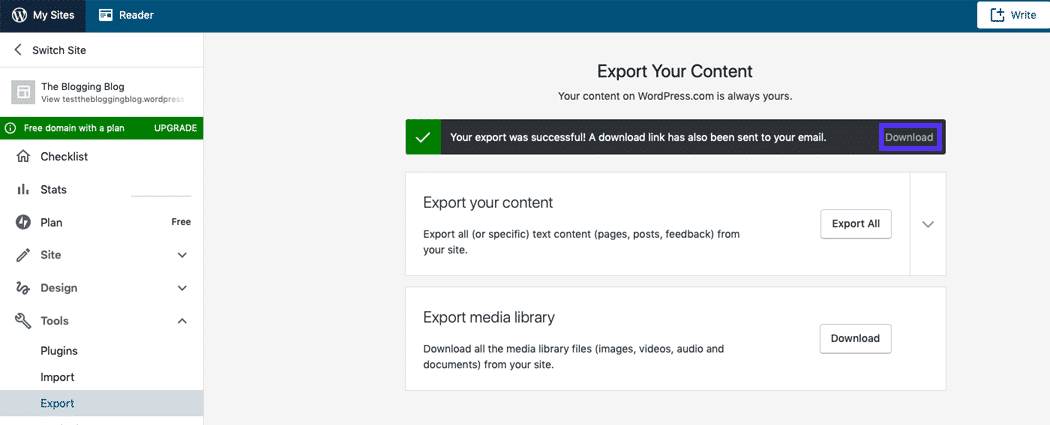
Depending on your browser and its current settings, the Zippo file may be automatically downloaded, you may be given an option to cull where to save the file, or yous may be asked if you want to open it right away.
Exporting Media
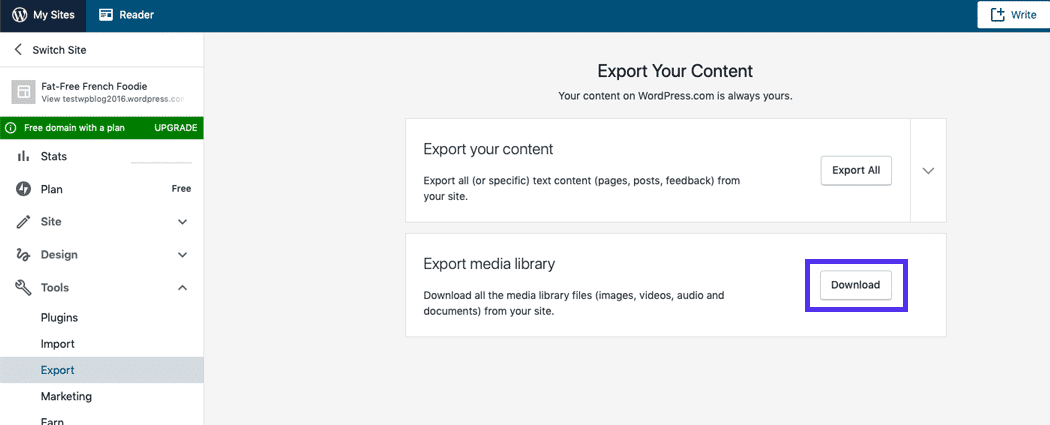
You tin can too choose to only consign WordPress site media you take uploaded to your Media Library.
Step one
To exercise this, click My Sites at the top left-mitt corner, and go to Tools > Consign after logging into your WordPress.com account.
If you don't encounter the site listed toward the superlative that you desire to consign, follow step one that was covered before to switch between sites.
Footstep 2
Next, click the Download button in the Export media library section.
Step 3
Then, salvage the generated TAR file to your figurer.
As previously mentioned, depending on your browser and its settings, yous may demand to confirm that y'all want to download the file, you may be prompted to select a folder to salve the file, or the download may start straight abroad.
Exporting Links
You lot can also export WordPress site links, which are also known equally your blogroll. Information technology tin be washed with the steps below.
Step 1
In your browser'due south accost bar, enter in your-site.wordpress.com/wp-links-opml.php and be sure to supervene upon "your-site" with your actual site'southward proper name.
Step ii
Then, salve the file to your computer. Depending on your browser, you may have to confirm the download before the process begins.
Exporting from a WordPress.com Individual Site
If your site is marked every bit private, the steps outlined above to consign WordPress site content won't piece of work. Simply, if y'all showtime brand your website public, you tin get ahead and export what yous demand. Don't worry, you can switch your site back to existence individual later on you're done.
Pace 1
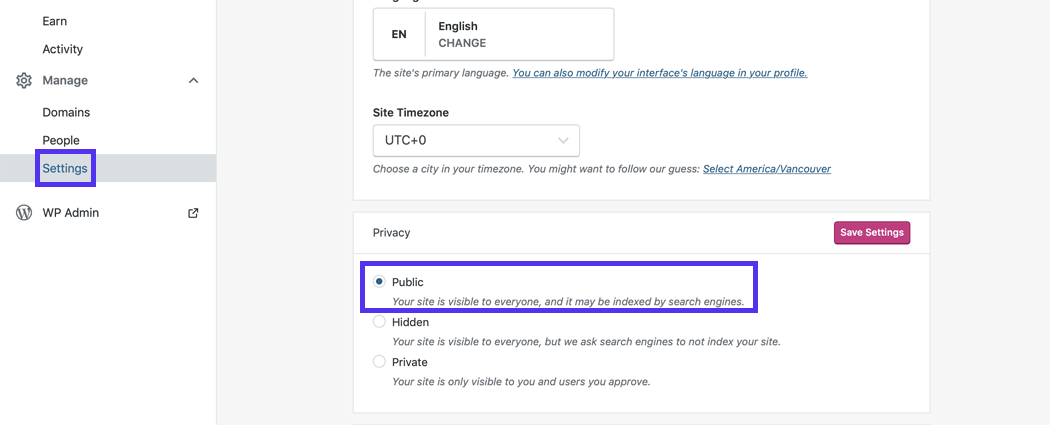
To make your site public, make sure you're logged into WordPress.com and click the My Sites at the pinnacle, left corner.
If the site where yous want to export content isn't listed, click the Switch Site push, and select the appropriate website from the list as mentioned earlier.
Step ii
Next, click Manage > Settings in the menu on the left side of the page. Double-check that yous're on the General tab that's displayed past default.
Step 3
Whorl down to the Privacy section and select Public from the list. So, click Save Changes.
Step 4
Follow the steps found earlier that represent to the type of content you want to consign.
Step five
This is an optional stride but if yous desire your site to be private over again, get back to Manage > Settings and ringlet downward to the Privacy section of the General tab.
Select Private from the list, then click the Salvage Changes button.
For cocky-hosted WordPress sites, you can export WordPress site content directly in your admin dashboard. This is useful if you only want to migrate your site'south written content and media files rather than the WordPress cadre files or database. It'due south also a great option if you lot want to keep an actress backup of your site's content.
There are specific types of site content you tin can export with this method:
- Posts
- Pages
- Media
- Other content
- All content listed above
Other content can include data created by ecommerce plugins such as:
Subscribe At present
- Products
- Orders
- Variations
- Coupons
- Testimonials
Information technology can also exist in the form of content some of your installed plugins can create:
- Contact forms
- Case studies
- Popups
- Showcases
- Other similar content
Here are the steps to successfully export WordPress content using congenital-in tools:
Stride 1
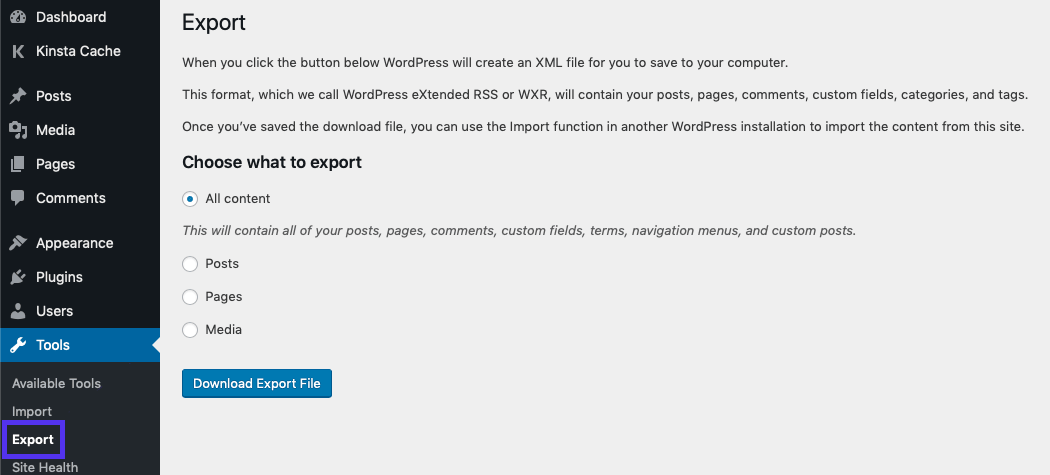
If y'all want to consign these types of content, be sure you're logged into your self-hosted WordPress site. Then in the admin dashboard, go to Tools > Export in the bill of fare on the left.
Step 2
At this point, you can choose All Content, or you tin can select 1 of the other options.
Footstep iii
Click the Download Export File push button and wait for the consign procedure to consummate. In one case the file is ready with your exported content, you can salve information technology to your reckoner.
Depending on your browser and its current settings, you may be prompted before the download really begins.
How to Export WordPress Site Using MyKinsta
If you want to consign WordPress site files also as database tables, you can do so through MyKinsta and the steps below.
Step i
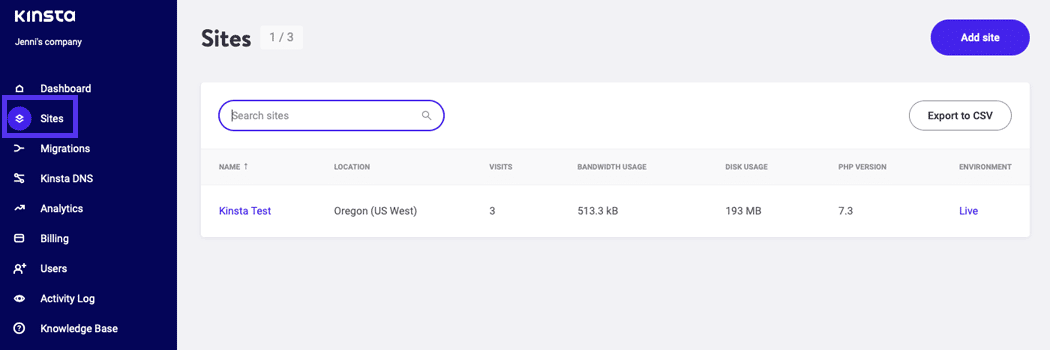
Log into your MyKinsta business relationship and click Sites in the menu on the left-manus side of the page.
Step two
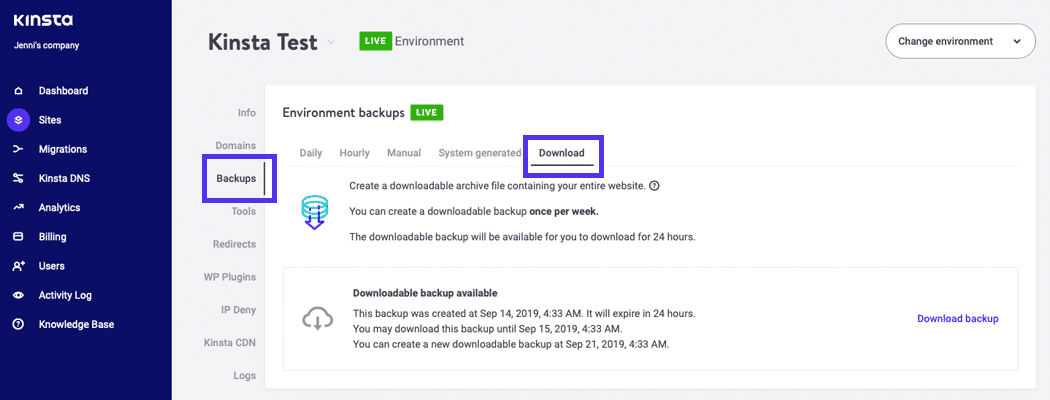
Click the link of the site from the list that you desire to have exported. Then, become to the Backups tab on the left, and click the Download tab toward the top.
Step 3
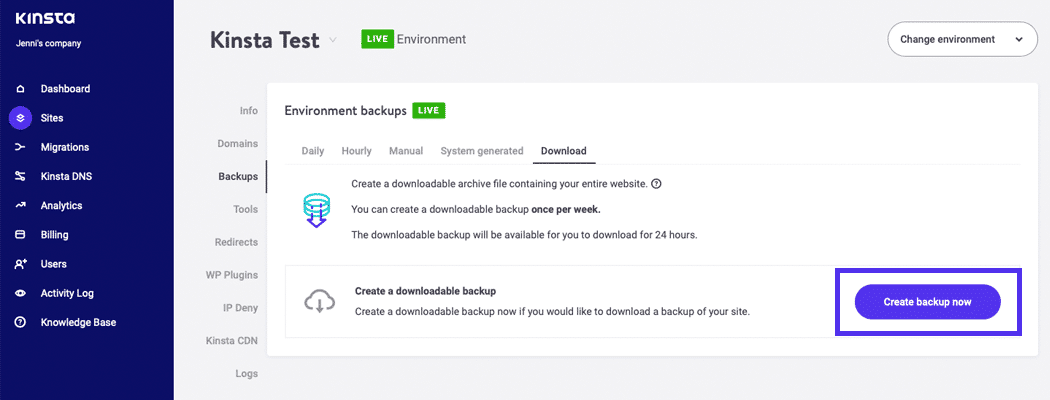
In the event that you haven't yet created a downloadable backup, y'all tin can click the Create backup at present push.
Information technology may be important to note that depending on the size of your site, you may need to wait several minutes for the backup to finish processing.
If a backup and its details are displayed on the Download tab, you lot can click the Download backup link and save the file to your estimator.
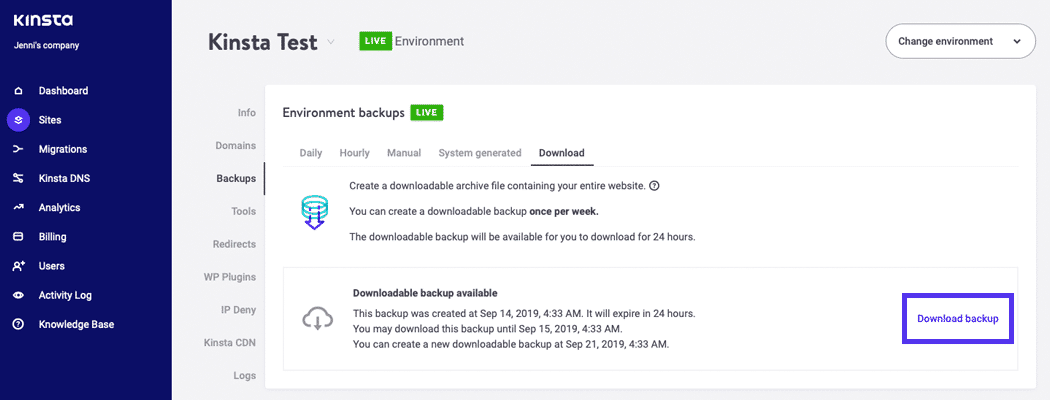
Keep in mind that your browser may ask you lot to confirm the download before it's saved to your computer. This depends on the type of browser yous're using.
How to Export WordPress Site Manually with phpMyAdmin + SFTP
For self-hosted WordPress websites, y'all besides have the option to export WordPress site files via SFTP as well every bit export WordPress site database tables through phpMyAdmin.
The steps for both options are detailed below:
Exporting Your WordPress Files
To export WordPress site files with this option, you need to take an FTP (File Transfer Protocol) client such as FileZilla installed on your computer.
Step 1
Fire up your preferred FTP client and connect to your site using SFTP (Secure File Transfer Protocol) to go started (empathise the divergence between FTP and SFTP).
Depending on the FTP customer y'all're using, the steps on how to do this may vary then consult the software'south documentation for details if yous're unsure of how to connect.
You lot can as well check out How to Employ SFTP to Connect to Your WordPress Site for details.
Step 2
Locate the folder, or sub-folder you desire to consign from the list of your site's files and folders.
Step 3
So, click and drag the file to the section of the FTP client dedicated to your reckoner.
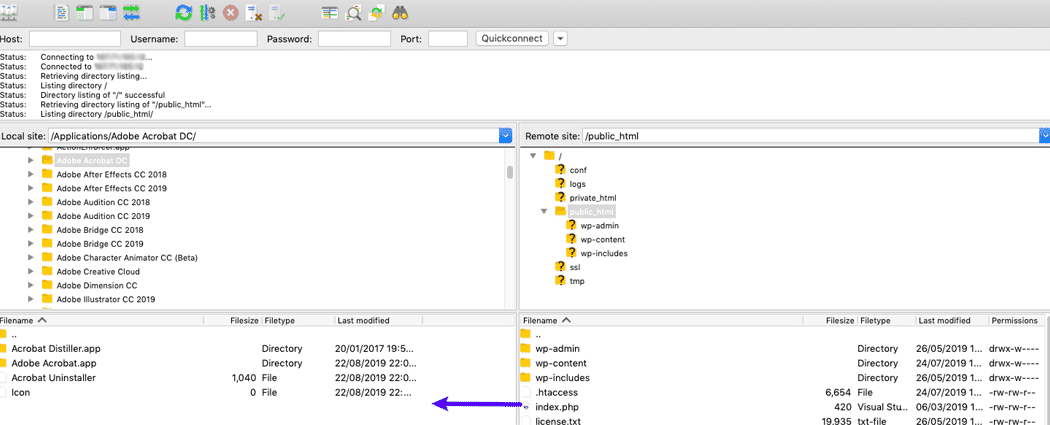
Yous can too choose to select multiple files and folders at one time.
It may be important to note that depending on the size of the file or folder, information technology may take a minute (or two) to finish downloading the file.
Exporting Your WordPress Database
You can choose to export WordPress site database tables for self-hosted WordPress websites. This is peculiarly useful if your site'south files are even so intact, you desire a redundant backup, or you otherwise only require your database tables for your specific needs.
For details, bank check out How to Backup MySQL Database (2 Incredibly Easy Methods).
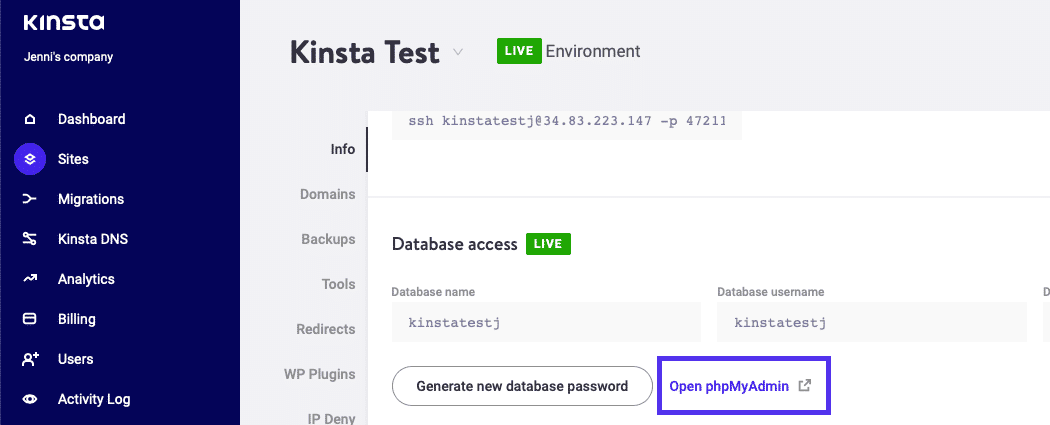
Step 1
Log into phpMyAdmin through MyKinsta, or cPanel. If you want to log in quickly, you can practice then with MyKinsta after you have logged in.
Click Sites in the bill of fare on the left-hand side, then click on the site on the list which y'all want to consign.
Ringlet down to the Database access section. You can view your login credentials besides as click the Open phpMyAdmin link to access your database in a new browser tab.
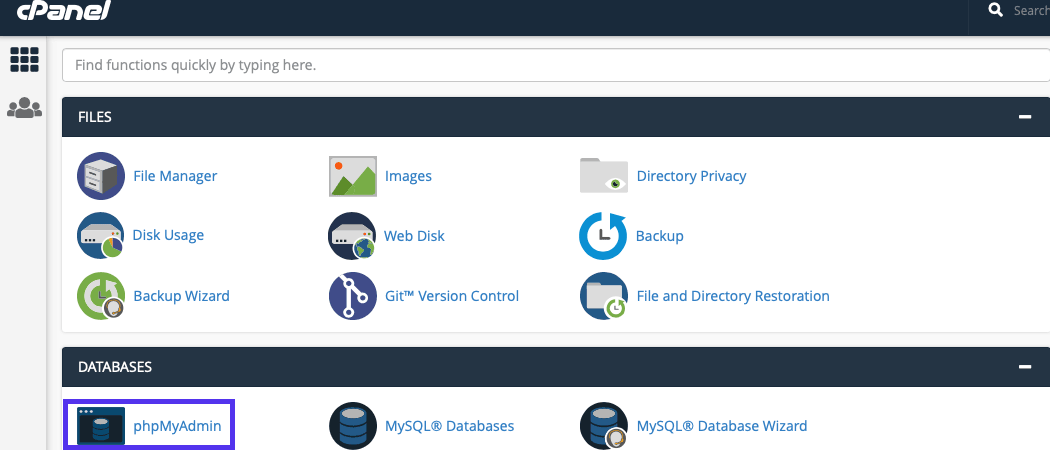
If your host uses cPanel, you lot can log into your account and find the link to phpMyAdmin under the Databases section.
Step 2
Once you lot're in phpMyAdmin, notice your site's database listed in the card on the left, then click on it.
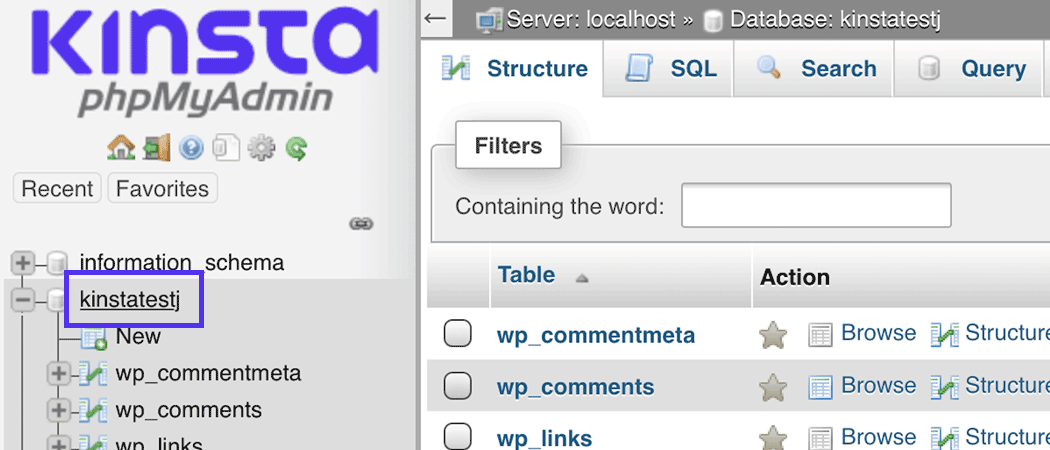
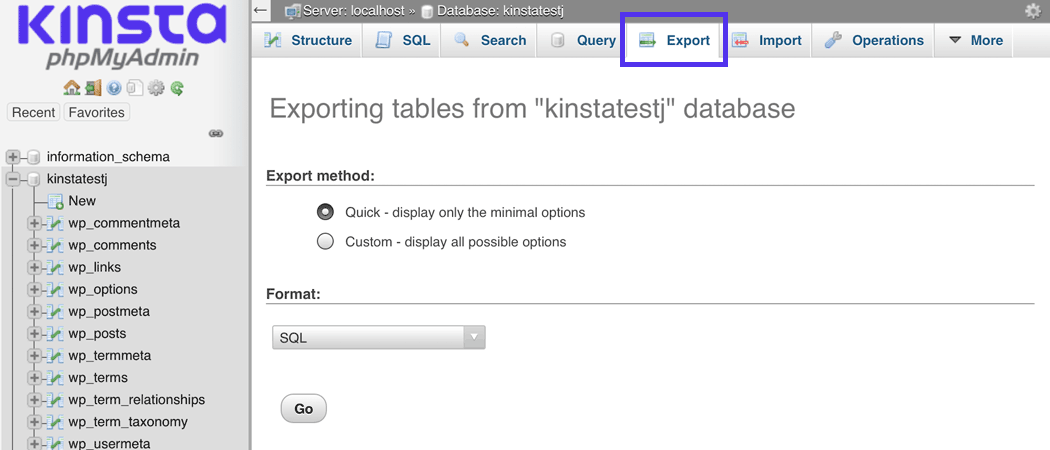
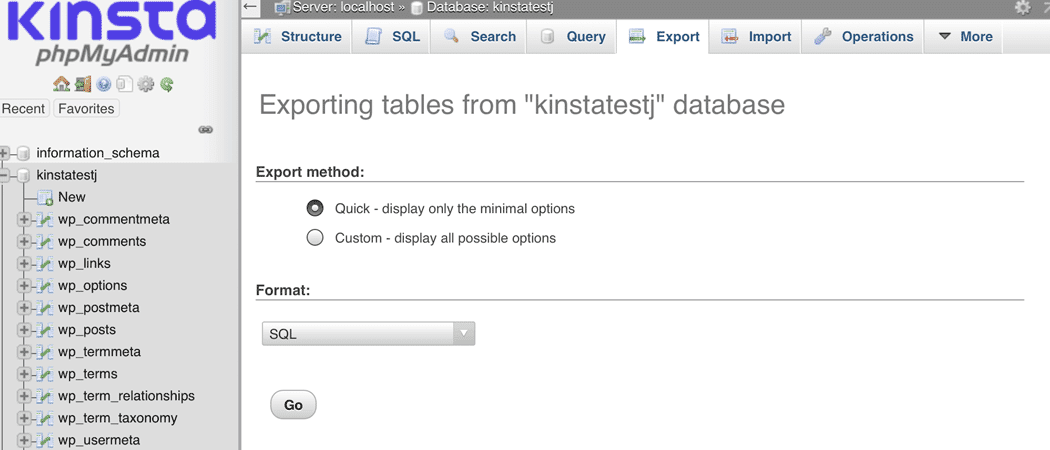
Step 3
Side by side, click on the Export tab located in the chief content area of then folio.
Step 4
At this indicate, yous can choose to export your entire database with either the quick or custom methods. The quick option is great if you lot require a backup of your database, or you want to import your database to a fresh installation of WordPress later on. But, if you're planning on importing your database to a pre-existing WordPress site, choose the custom export method.
To export all your database tables, select the Quick option.
To export your database so it tin exist imported to a pre-existing WordPress site, choose the Custom option.
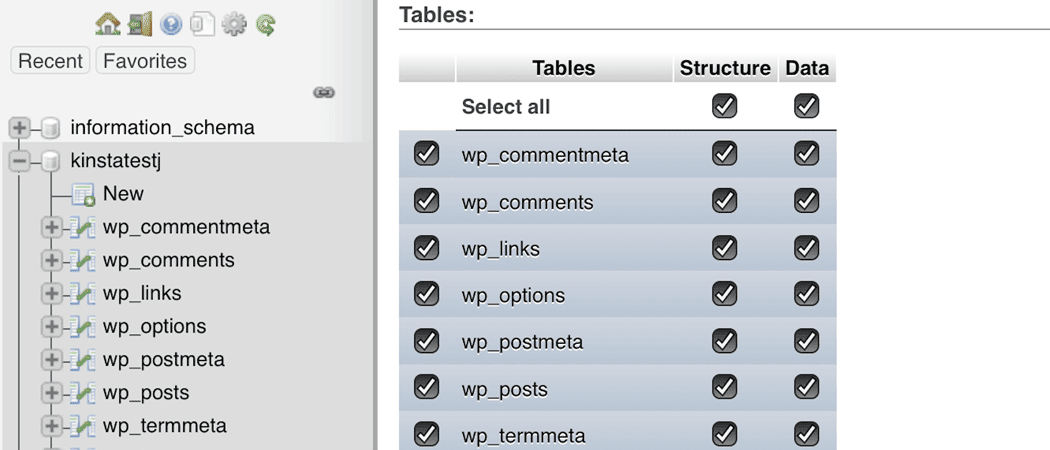
Additional options will dynamically appear. Select the tables from the list that you want to export.
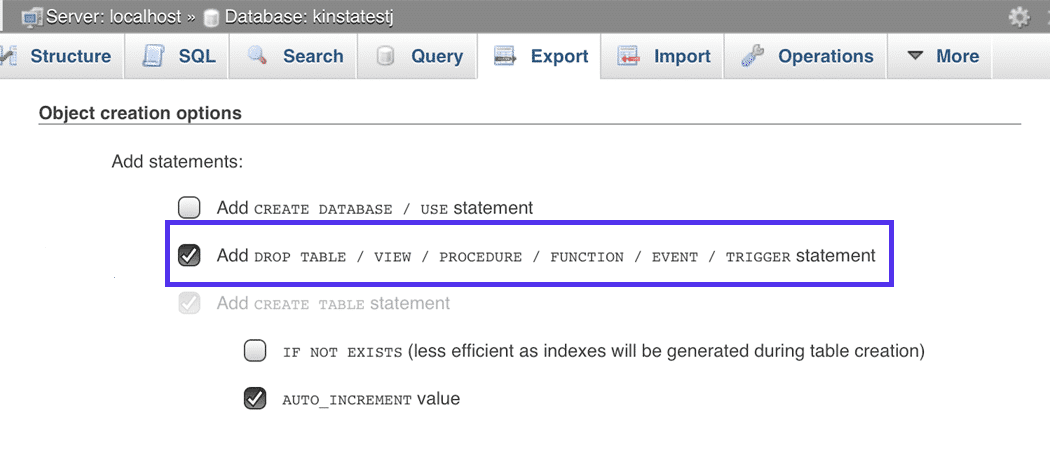
Then, coil down and bank check the box for Add DROP TABLE / VIEW / Procedure / FUNCTION / Event / TRIGGER statement. This ensures the tables with the same proper name in your pre-existing database are dropped, or in other words, deleted. That way, you can successfully import the tables y'all want.
Pace 5
Click the Go push and look for the process to consummate. This may accept a while depending on how large your database may be.
When the SQL file has finished processing, you can salve it to your calculator.
Summary
With the steps outlined above, you at present know how to export WordPress sites from WordPress.com, using WordPress' congenital-in tool, with MyKinsta, and by using SFTP and phpMyAdmin.
If you require further aid and you have a WordPress site hosted with the states, don't hesitate to contact our support squad. You can too cheque out our noesis base for more documentation articles. We'll assist sort everything out for yous.
Save time, costs and maximize site performance with:
- Instant aid from WordPress hosting experts, 24/seven.
- Cloudflare Enterprise integration.
- Global audition reach with 29 data centers worldwide.
- Optimization with our congenital-in Awarding Performance Monitoring.
All of that and much more than, in ane programme with no long-term contracts, assisted migrations, and a 30-day-money-back-guarantee. Check out our plans or talk to sales to notice the plan that's right for you.
Source: https://kinsta.com/knowledgebase/export-wordpress-site/
Belum ada Komentar untuk "Download Entire Website to Build Again"
Posting Komentar